We use cookies to make your experience better. To comply with the new e-Privacy directive, we need to ask for your consent to set the cookies. Learn more.
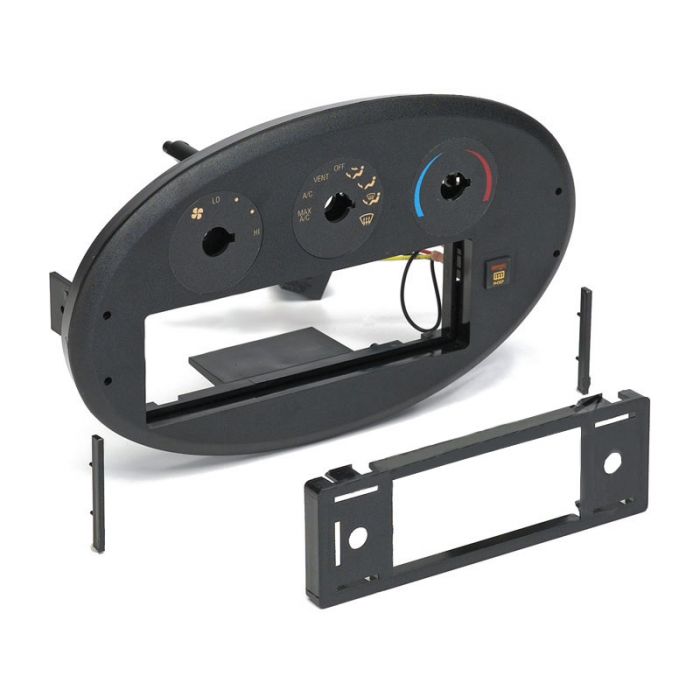
DISCONTINUED - Metra Dash Kit 99-5715 Ford Taurus and Mercury Sable 1996-1999 Vehicles
$96.99
Out of stock
SKU
99-5715
Metra Dash Kit 99-5715 Ford Taurus and Mercury Sable 1996-1999 Vehicles
Unit Includes: Integrated Mounting Kit
Metra Dash Kit 99-5715 Ford Taurus and Mercury Sable 1996-1999 Vehicles features:
Metra Dash Kit 99-5715 Ford Taurus and Mercury Sable 1996-1999 Vehicles features:
- Fits perfectly into dash opening
- Uses factory heater and A/C controls
- Rear defroster switch included
- Use factory radio spring clips to attach radio
- Does not include harnesses
- NOTE - Metra’s 70-5715 must be used with 1996-1997 models.
- NOTE - Metra’s 70-5715 and 70-5716 must be used with 1998-1999 models.
- Kit Components - Integrated Mounting Kit
- Tools Required - Torx Driver, 86-5618 Head Unit Removal Keys and Dremel Tool
- Metra Electronics Corp. 99-5715 (Ford Taurus 1996-1999 and Mercury Sable 1996-1999)
- Metra Electronics Corp. 99-5715LD (With Harness)
- Metra Electronics Corp. 99-5715LDS (With 70-5715 Extension Harness and 70-5716 Harness)
- Metra's Install kits are manufactured from OEM quality ABS plastic designed to leave no gaps between the dash and the kit.
- Ford Taurus 1996-1999
- Mercury Sable 1996-1999
- 99-5715 Instruction Manual
| Manufacturer | Metra |
|---|---|
| Part Number | 99-5715 |
| Chassis Size | Single DIN |
| Color | Dark Grey |
| Warranty | 1 Year |
| Vehicle Year | 1996, 1997, 1998, 1999 |
| Vehicle Brand | Ford, Mercury |
| UPC Code | 086429021703 |
| Return period | 30 days |
| Exchange period | 30 days |
Write Your Own Review
Customer Questions
More from Metra


