We use cookies to make your experience better. To comply with the new e-Privacy directive, we need to ask for your consent to set the cookies. Learn more.

Metra 99-3010S Single or Double DIN Installation Kit for 2010 - 2015 Chevrolet Camaro Vehicles - Onstar and Amplfied audio
$431.99
In stock
SKU
99-3010S

Expert Knowledge
Talk to a specialist
- Install an aftermarket Single or Double DIN car stereo with a gap less fit
- Ensures interface to support in-built climate controls, supply switched ignition and retain all chimes
- Perfectly accommodates ISO Single DIN and Double DIN mounts
- Provides a storage pocket for a Single DIN mounting
- Painted and textured to match the company-installed interior
- Designed and manufactured with precision tolerances
- Top-quality ABS Plastic construction
- Fits vehicles with steering wheels controls, OnStar, and Factory amplification
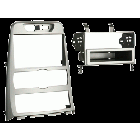
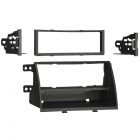
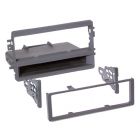
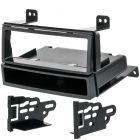
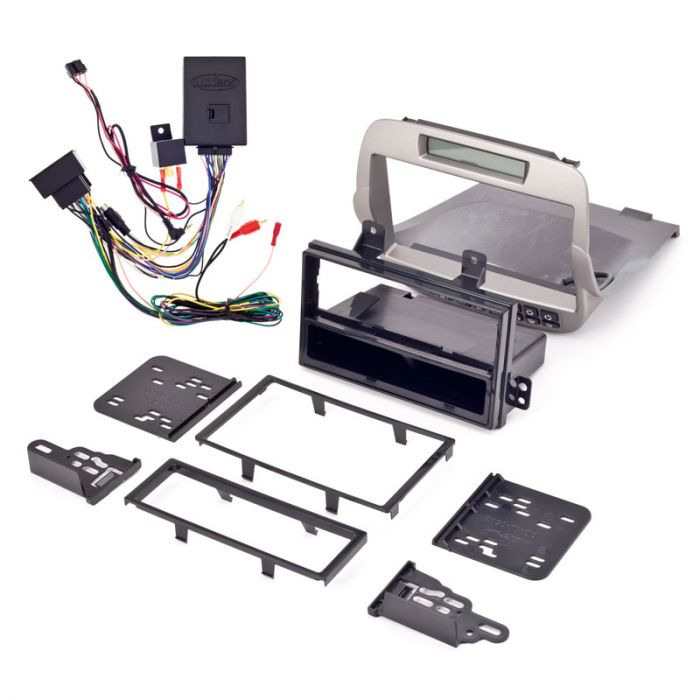
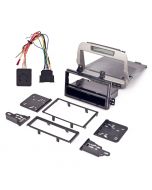
Unit Includes: Storage Pocket, Housing Brackets, Radio Trim Panel, Radio Housing, Interface, 4 Phillips Screws, 2 Panel Clips, 4-Pin to 44-Pin Camaro Harness and Instruction Guide
Just like factory and easy installation
Just like factory and easy installation
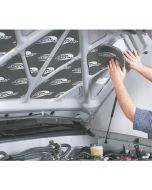
Get everything you need to change out the radio in 2010 and up Chevy Camaro's. This full featured dash kit and harness preserves all factory functions like door chime, warning signals, OnStar, Factory Amplified stereo, even the center console 3.5mm Jack! The trim is painted to match your factory silver trim and has soft touch air conditioner buttons that have blue illumination and have all the factory climate controls.
Note: For vehicles without OnStar or Amplified Audio, this Dash kit will not work for your application. Please look at the Metra 90-3010LC as this dash kit includes the harness for non OnStar vehicles and is designed for factory audio systems that don not have a factory amplifier
- Fits 2010 and up Chevy Camaro
- Allows for Double DIN Installation - ISO mount
- Allows for Single DIN Installation - ISO mount
- Allows the user to install an aftermarket Single or Double DIN car stereo with a gap less fit
- Single DIN installation have pocket below radio opening
- Retains factory amplifier for exception sound quality and no rewiring
- Interfaces factory OnStar with aftermarket radio, all radios are compatible
- Retains 3.5mm Audio jack in the center console for digital media players, connects to auxilliary in on the aftermarket radio with RCA cables
- Retains controls for the heated seats, hazard lights, and lock/unlock
- Offers interface to support in-built climate controls, supply switched ignition and retain all warning chimes including back-up sensor chimes
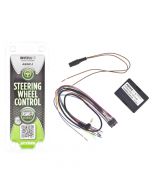
- Retains steering wheel controls but requires the purchase of Axxess ASWC
- USB Software is flash up-dateable to accommodate for future changes requires the purchase of Axxess USB-CAB
- Painted and textured to match the company-installed interior
- Designed and manufactured with precision tolerances
- Durable ABS Plastic construction
Note: For vehicles without OnStar or Amplified Audio, this Dash kit will not work for your application. Please look at the Metra 90-3010LC as this dash kit includes the harness for non OnStar vehicles and is designed for factory audio systems that don not have a factory amplifier
| Manufacturer | Metra |
|---|---|
| Part Number | 99-3010S |
| Chassis Size | Single or Double DIN |
| Color | Silver |
| Warranty | 1 Year |
| Vehicle Year | 2010, 2011, 2012, 2013, 2014, 2015 |
| Vehicle Brand | Chevrolet |
| Vehicle Model | Camaro |
| UPC Code | 086429216680 |
| Return period | 30 days |
| Exchange period | 30 days |
Write Your Own Review
Customer Questions
Car stereo installation
We show you the complete process of installing a Pioneer Double DIN car stereo in a Chevy truck. The in-depth video shows the installation of the interface, and steering wheel control.
Stereo Installation Basics
Let's start with the basics of replacing your car stereo receiver. In out first video we demonstrate how to crimp or solder your wiring, mount your new receiver to your dash kit and prepare everything for an installation in your vehicle.
Wiring Harnesses Explained
What do all of the wire colors mean? Aftermarket manufacturers have made car stereo receiver installation an easier process by using a standardized wire color scheme. We walk you through what each individual wire does, this way if you have an installation that doesn't perform properly you will have the resources to begin troubleshooting your installation.
Related Products
Check items to add to the cart or


We found other products you might like!

More from Metra